Generative Watercolor in Processing
All Processing code for this article, along with images and animated GIFs, can be found on Github
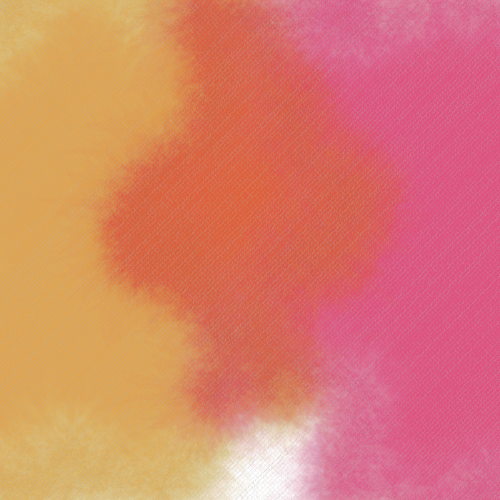
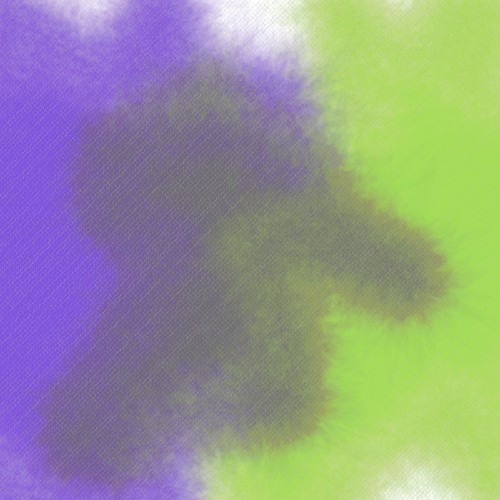
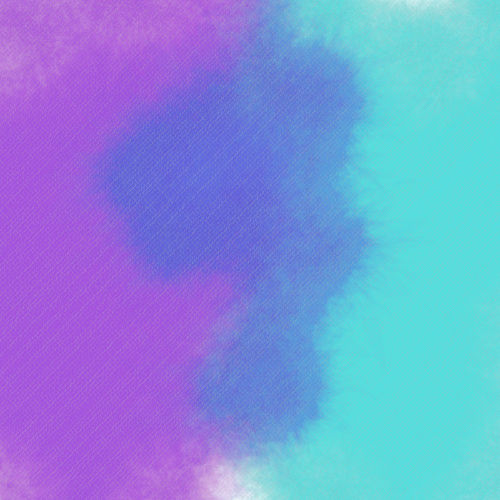
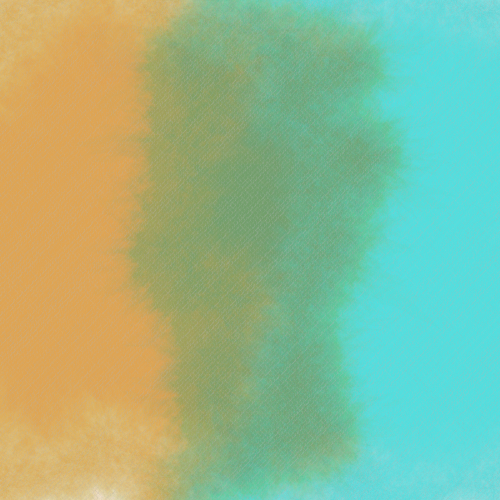
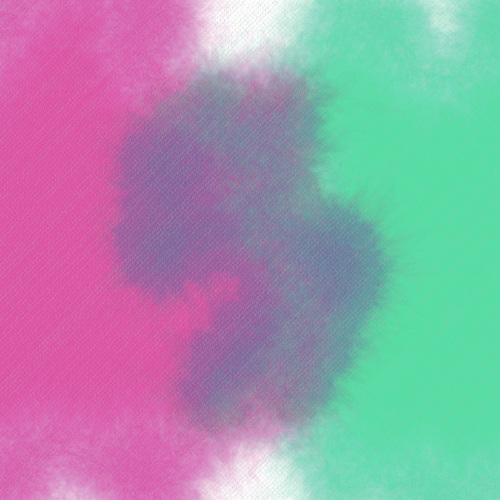
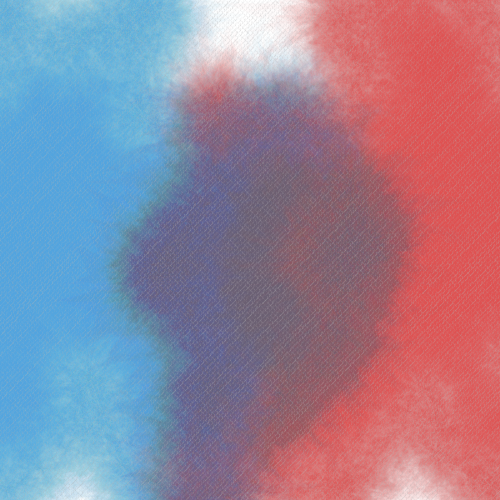
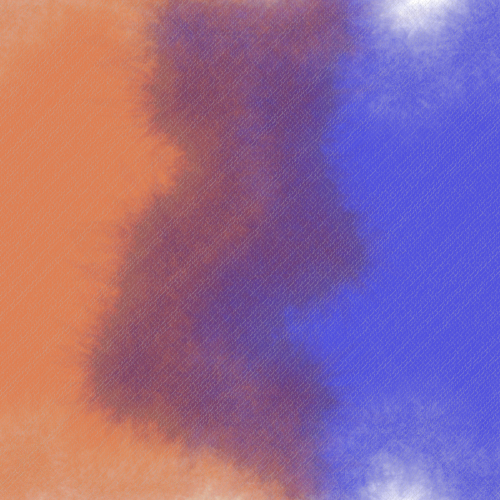
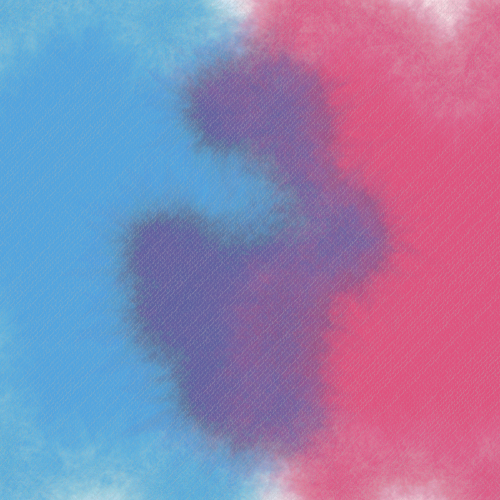
I recently came across Tyler Hobbs’ fantastic post on simulating watercolor paints and decided to implement it in Processing. This article explains in detail how you can implement Tyler’s technique from scratch, and here is the kind of effect you’ll be able to create by the end.
Generative Watercolor: An Overview
The steps required to generate a single brush in the watercolor style shown above are: (i) start with a regular n-sided polygon, (ii) deform it to form a base polygon, (iii) create variations of the base polygon by deforming it further, (iv) stack all the variations using a low opacity, and finally (v) interleave polygon layers from different brushes so that overlapping areas blend correctly. As a bonus, I’ve also added a section on how to add some canvas- or paper-like texture to the final result.
Step 1: Creating a Regular Polygon
We begin by creating a regular polygon with a specified number of sides. This
can be done quite simply with the function below, which generates an nsides-sided
regular polygon with radius r with the center at (x, y).
ArrayList<PVector> rpoly(float x, float y, float r, int nsides) {
  ArrayList<PVector> points = new ArrayList<PVector>();
  float sx, sy;
  float angle = TWO_PI / nsides;

  /* Iterate over edges in a pairwise fashion. */
  for (float a = 0; a < TWO_PI; a += angle) {
    sx = x + cos(a) * r;
    sy = y + sin(a) * r;
    points.add(new PVector(sx, sy));
  }
  return points;
}
Note the use of an ArrayList<PVector> to hold our list of points. A PVector
is an easy way to represent a pair of X/Y coordinates in Processing, and since
we want a polygon with multiple points, we use an array of such coordinates (via the
ArrayList class). This is a handy way to represent polygons in Processing that
are comprised of many points, and we can draw these points easily with the
following code.
void setup() {
  ArrayList<PVector> poly;

  size(500, 500);
  background(255);
  noStroke();
  fill(255, 0, 0);

  poly = rpoly(width/2, height/2, width/3, 10);
  beginShape();
  for (int i = 0; i < poly.size(); i++)
    vertex(poly.get(i).x, poly.get(i).y);
  endShape(CLOSE);
}
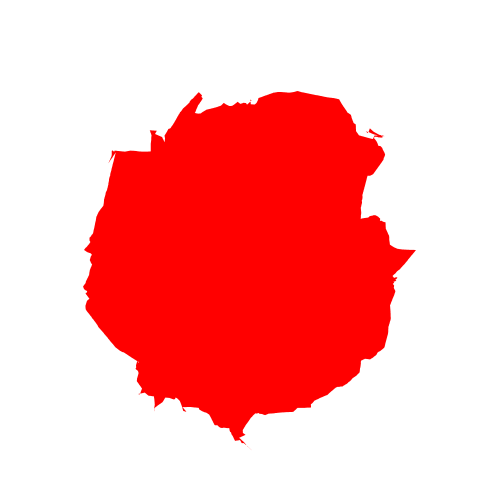
In the above, we generate a 10-sided regular polygon centered at (width/2, height/2)
with a radius of width/3. The loop iterates over the points sequentially, adding
them as vertices of a shape, and we finally close the shape with a call to
endShape(). What we end up with is the following.
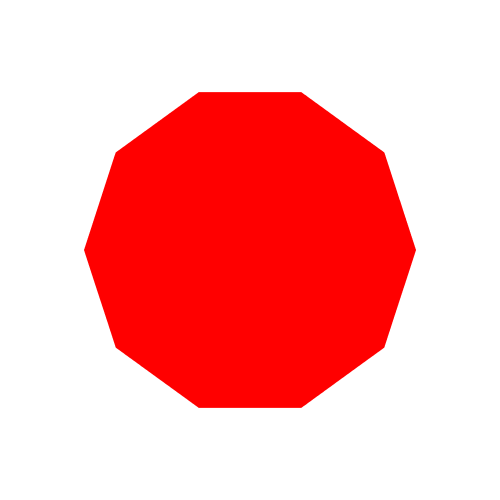
It should be noted that there’s no inherent reason to begin with a regular polygon for our watercolor brushes other than convenience and simplicity. You can specify any set of points making up any arbitrary shape (e.g., for implementing different brush shapes).
Step 2: Deforming a Polygon
Now that we have a regular polygon, the next step is to deform it. The function below shows my version of this.
ArrayList<PVector> deform(ArrayList<PVector> points, int depth,
                            float variance, float vdiv) {

  float sx1, sy1, sx2 = 0, sy2 = 0;
  ArrayList<PVector> new_points = new ArrayList<PVector>();

  if (points.size() == 0)
    return new_points;

  /* Iterate over existing edges in a pairwise fashion. */
  for (int i = 0; i < points.size(); i++) {
    sx1 = points.get(i).x;
    sy1 = points.get(i).y;
    sx2 = points.get((i + 1) % points.size()).x;
    sy2 = points.get((i + 1) % points.size()).y;

    new_points.add(new PVector(sx1, sy1));
    subdivide(new_points, sx1, sy1, sx2, sy2,
                depth, variance, vdiv);
  }

  return new_points;
}
In the above code, the first thing to note is that the function takes as input,
a set of polygon vertices (via the points parameter) and returns a new set of
deformed vertices (via new_points).
In the main loop, we iterate over the set of points in a pairwise fashion to
get the X/Y coordinates for both points of individual edges. These get stored
in (sx1, sy1) and (sx2, sy2). You’ll note the use of the indices i and
i + 1 to get the ith and (i+1)th vertex. Since for the
last point i + 1 would exceed the length of the array, we wrap back to the
0th index using the module operator (%).
Finally, we add the first point to new_points, followed by a call to a
subdivide() function that adds the randomly-shifted midpoint of the two ends
of the edge to new_points. We’ll look into this function in more detail in a
moment, but it receives a depth parameter that specifies the recursion depth
to which we want to subdivide the edge, a variance that is used to specify
the magnitude of the shift, and a vdiv parameter that is used to reduce the
variance with each successive recursive call. We’ll look at this in more detail
in a bit.
You’ll note in our loop that we don’t add the second point to new_points.
This is simply because, when iterating pairwise, the second point will be added
when it becomes the first point of the next iteration. This just leaves one
corner case of the last edge, which has no next iteration. However, here again,
since we start with a closed polygon, the second point of the last edge is the
same as the first point of the first edge, which we already added to new_points.
Subdividing an Edge
/*
 * Recursively subdivide a line from (x1, y1) to (x2, y2) to a
 * given depth using a specified variance.
 */
void subdivide(ArrayList<PVector> new_points,
                 float x1, float y1, float x2, float y2,
                 int depth, float variance, float vdiv) {
  float midx, midy;
  float nx, ny;

  if (depth >= 0) {
    /* Find the midpoint of the two points comprising the edge */
    midx = (x1 + x2) / 2;
    midy = (y1 + y2) / 2;

    /* Move the midpoint by a Gaussian variance */
    nx = midx + randomGaussian() * variance;
    ny = midy + randomGaussian() * variance;

    /* Add two new edges which are recursively subdivided */
    subdivide(new_points, x1, y1, nx, ny,
                depth - 1, variance/vdiv, vdiv);
    new_points.add(new PVector(nx, ny));
    subdivide(new_points, nx, ny, x2, y2,
                depth - 1, variance/vdiv, vdiv);
  }
}
Creating a Base Polygon
We can now generate a base polygon to work with.
ArrayList<PVector> create_base_poly(float x, float y,
                                      float r, int nsides) {
  ArrayList<PVector> bp;
  bp = rpoly(x, y, r, nsides);
  bp = deform(bp, 5, r/10, 2);
  return bp;
}
We create a regular polygon, deform it, and return it. I’ve found that having
five layers with a variance of a 10th of the radius, with a halving
of the variance between recursive calls (i.e., vdiv is 2) works nicely.
Here’s the result.
Generating Variations of the Base Polygon
Generating variations is fairly easy since our deform function is agnostic to the shape being passed. Instead of a regular polygon, we just give it our base polygon from the previous step.
void setup() {
  ArrayList<PVector> base, variation;

  base = create_base_poly(width/2, height/2, width/3, 10);
  variation = deform(base_poly, 5, random(r/10, r/4), 4);
}
Step 4: Stacking Multiple Polygons
So far we’ve been generating individual polygons. It’s now time to stack them up together to form our watercolor brush.
Above, we represent a single vertex using a PVector, and a single polygon using
ArrayList<PVector>, that is a list of PVector’s. Well, we can make use of
the same built-in types to create a stack of polygons: we represent it as a
list of polygons, which is an ArrayList<ArrayList<PVector>>!
Here’s a simple function for creating a stack of polygons centered at (x, y)
and radius r starting with a base polygon with nsides sides.
ArrayList<ArrayList<PVector>>
polystack(float x, float y, float r, int nsides) {
  ArrayList<ArrayList<PVector>> stack;
  ArrayList<PVector> base_poly, poly;
  stack = new ArrayList<ArrayList<PVector>>();

  /* Generate a base polygon with depth 5 and variance 15 */
  base_poly = rpoly(x, y, r, nsides);
  base_poly = deform(base_poly, 5, r/10, 2);

  /* Generate a variation of the base polygon with a random variance */
  for (int k = 0; k < 100; k++) {
    poly = deform(base_poly, 5, random(r/15, r/5), 4);
    stack.add(poly);
  }

  return stack;
}
We first create a base polygon followed by one hundred variations. Each time,
we add the variation to the stack before finally returning it at the end.
There’s a lot of room for exploration in the variance and vdiv parameters
passed to the deform() functions, but for convenience, I’ve picked and
hard-coded ones that look visually appealing to me.
We can render this stack of polygons on screen using the following function.
void draw_stack(ArrayList<ArrayList<PVector>> stack) {
  for (int i = 0; i < stack.size(); i++) {
    ArrayList<PVector> poly = stack.get(i);
    draw_poly(poly);
  }
}
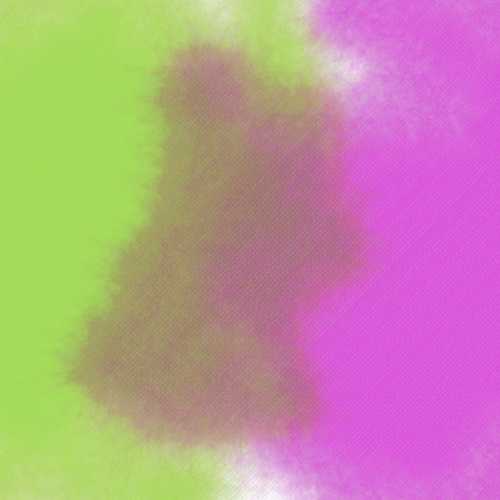
Here is the result!
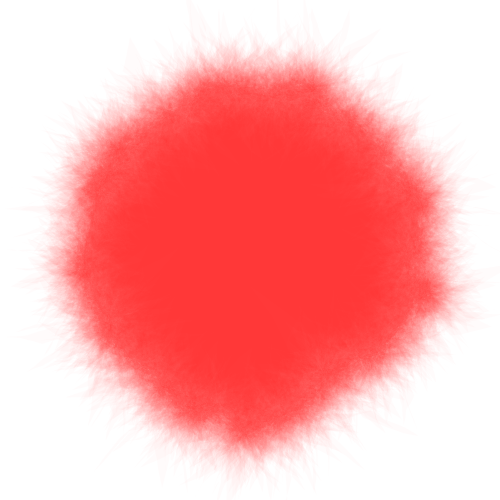
In Tyler’s original article, he also has a clever approach for creating areas of high and low variation, but I haven’t found an elegant way to do this. I’ll update this post at some point once I find one.
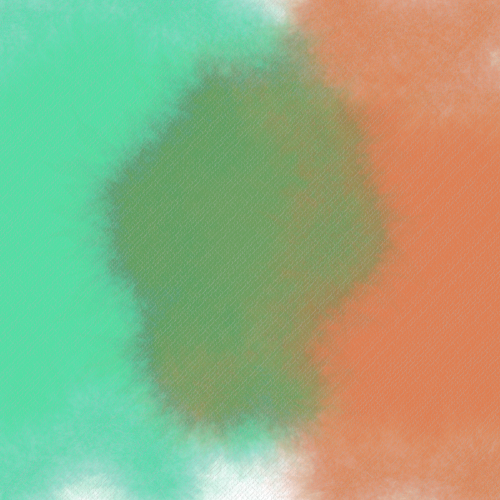
Step 5: Interleaving Brush Layers
To interleave layers, we take many stacked polygons and draw them a few layers at a time. Note that this means it’s not easy to draw watercolor brushes incrementally. That is, you must know beforehand, all the brushstrokes that are going to go on your canvas (or sub-region of the canvas) and draw them at once.
And I know what you’re thinking.
Yes.
That’s right.
We’re using an ArrayList<ArrayList<Arraylist<PVector>>>.
I suppose you could use classes at this point to ease the notation a bit, but I like the simplicity of sticking with functions that use built-in types. It’s also very easy to remember and, if you forget, to easily recreate in your head (vertices → polygon → stack of polygons → list of stack of polygons). If you prefer classes, it might be a useful learning exercise to try and abstract this logic into classes.
ArrayList<ArrayList<ArrayList<PVector>>> stacklist;
int[] colors;
int color_index = 0;

void setup() {
  ...
  stacklist = new ArrayList<ArrayList<ArrayList<PVector>>>();
  colors = new int[1000]; /* Up to 1,000 polygon stacks */
  ...
  stack = polystack(width/2, height/2, width/3, 10);
  stacklist.add(stack);
  colors[color_index++] = color(255, 0, 0, 4);
  ...
  stacklist_draw(stacklist, colors, 5);
}
We first create a stacklist variable and initialize it. Then we can create
one or more polygon stacks using the polystack() function we wrote earlier,
and add them to our stack list. Finally we draw them using draw_stacklist()
which takes a parameter of how many layers comprise each interleaving. So a value
of 5 means that the first 5 layers will be drawn for all stacks, followed by layers
5 – 10 and so on till no more layers remain in any polygon stack. The code for
this is shown below.
Note that we now need to provide some additional color information for each stack
of polygons so that the drawing function can set the fill color correctly. We
do this via a separate colors array. Everytime we add a stack to the stack list,
we also add a color associated with it to the colors array, which is passed
along with the stack list to the drawing function (see below). (Note that color
in Processing is simply an alias for int, and so it works if we just use an
integer array. It’s also why it’s difficult to use an ArrayList with colors as
they are not objects.)
void stacklist_draw(
        ArrayList<ArrayList<ArrayList<PVector>>> stacklist,
        int[] colors,
        int interleave) {
  int layer = 0;
  boolean all_empty;

  while (true) {
    all_empty = true;
    println("drawing layers " + layer + "--" + (layer+interleave));
    for (int i = 0; i < stacklist.size(); i++) {
      fill(colors[i]);
      ArrayList<ArrayList<PVector>> stack = stacklist.get(i);
      for (int j = layer; j < layer + interleave; j++) {
        if (j < stack.size()) {
          all_empty = false;
          draw_poly(stack.get(j));
        }
      }
    }
    layer += interleave;
    if (all_empty)
      break;
  }
}
Step 6: Simulating a Canvas Texture
Yes yes, I know. Watercolors are not painted on canvas. However, I think the effect it produces is very cool regardless! The basic idea is to finish drawing all our watercolor brush strokes and, at the very end, overlaying a fine canvas-like texture over the whole image.
Here’s the texture I came up with. (It’s been drawn on a black background for visibility as the lines are colored with a low-opacity white.)
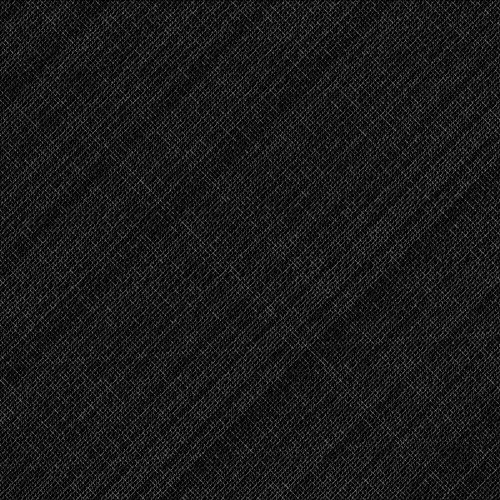
The way this was done was to draw two sets of lines at 45° and 135° degrees. With a low spacing between the lines, this gives a nice crosshatch.
Here’s the code for generating this.
void grid() {
  float spacing = 5;
  for (int i = -width; i < height + width; i+=spacing)
    line(i, 0, i + height, height);
  for (int i = height + width; i >= -width; i-=spacing)
    line(i, 0, i - height, height);
}
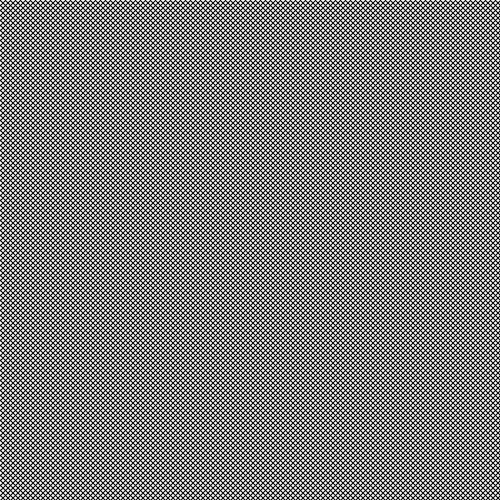
To make things a bit more interesting, I wrote a custom line-drawing function that draws the exact same lines, but in short segments, while varying the opacity, thickness, and orientation of each one (the last one only to a small extent). Here’s the code for that.
void gridline(float x1, float y1, float x2, float y2) {
  float tmp;
  /* Swap coordinates if needed so that x1 <= x2 */
  if (x1 > x2) { tmp = x1; x1 = x2; x2 = tmp; tmp = y1; y1 = y2; y2 = tmp; }

  float dx = x2 - x1;
  float dy = y2 - y1;
  float step = 1;

  if (x2 < x1)
    step = -step;

  float sx = x1;
  float sy = y1;
  for (float x = x1+step; x <= x2; x+=step) {
    float y = y1 + step * dy * (x - x1) / dx;
    strokeWeight(1 + map(noise(sx, sy), 0, 1, -0.5, 0.5));
    line(sx, sy, x + map(noise(x, y), 0, 1, -1, 1), y + map(noise(x, y), 0, 1, -1, 1));
    sx = x;
    sy = y;
  }
}
The above is a simple line algorithm that calculates the change in X and Y
directions for a given step and draws a smaller line with slight variations
in the position and stroke thickness. We simply replace the calls to line()
in our grid() function to gridline() calls and vary the opacity randomly
like shown below.
void grid() {
  float spacing = 5;
  for (int i = -width; i < height + width; i+=spacing) {
    stroke(255, random(20, 50));
    gridline(i, 0, i + height, height);
  }
  for (int i = height + width; i >= -width; i-=spacing) {
    stroke(255, random(20, 50));
    gridline(i, 0, i - height, height);
  }
}
And that’s it!