The Cohen-Sutherland Line Clipping Algorithm
All Processing code for this article, along with images, can be found on Github. For a copy-pasteable version of the algorithm, click here.
I’ve been following the work of Paul Rickards over on Twitter and he’s been churning out absolutely beautiful stuff on his plotters. If you haven’t seen them yet, go check them out over at #plottertwitter.
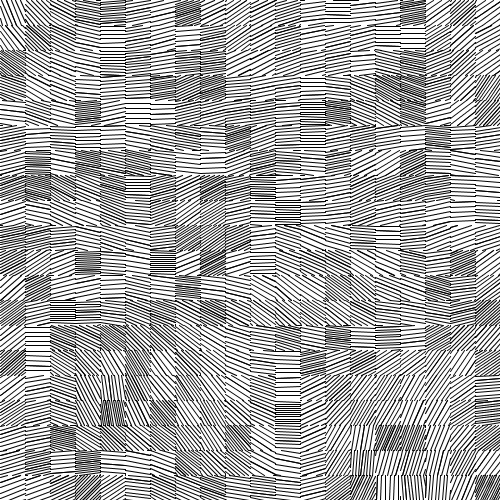
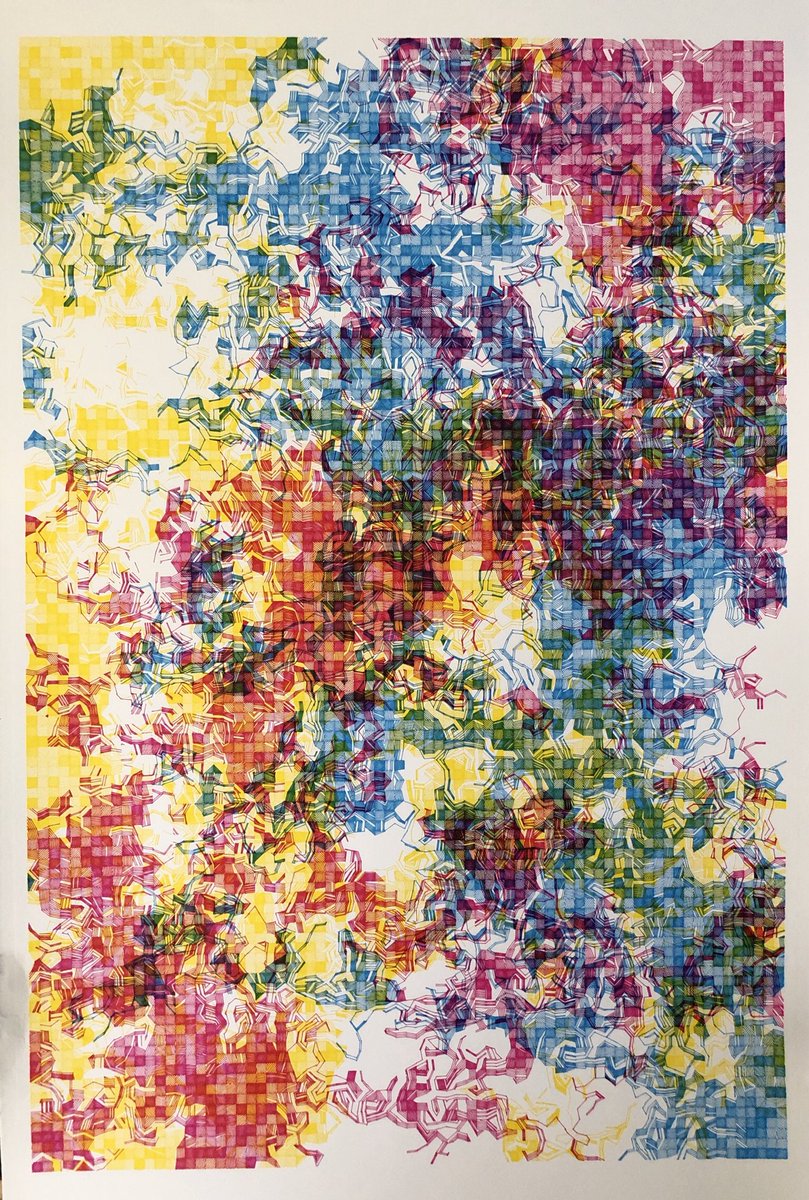 Tri-color plot by Paul Rickards
Looking closely at one of his works, one sees that it’s comprised of a grid of squares, with lines at arbitrary angles with variations in the spacing between them.
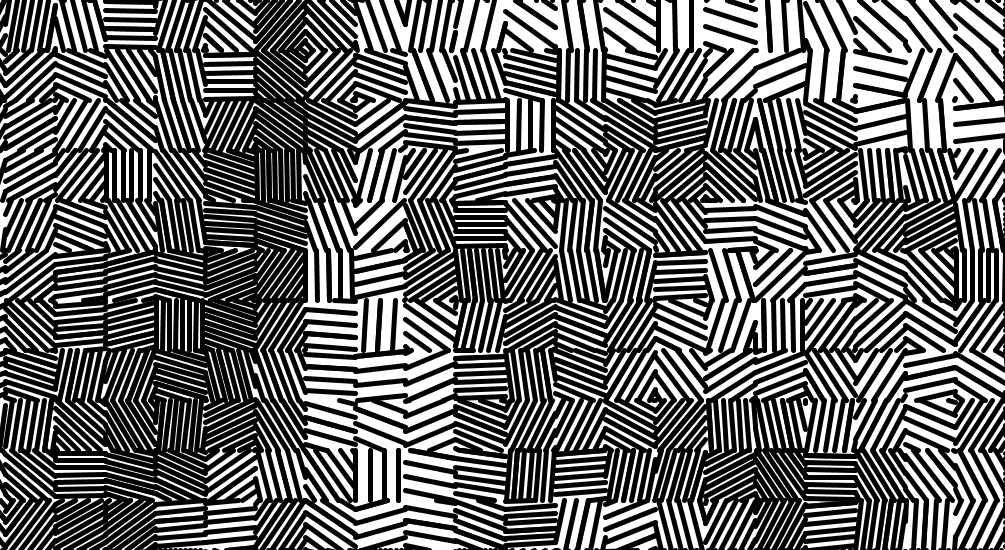
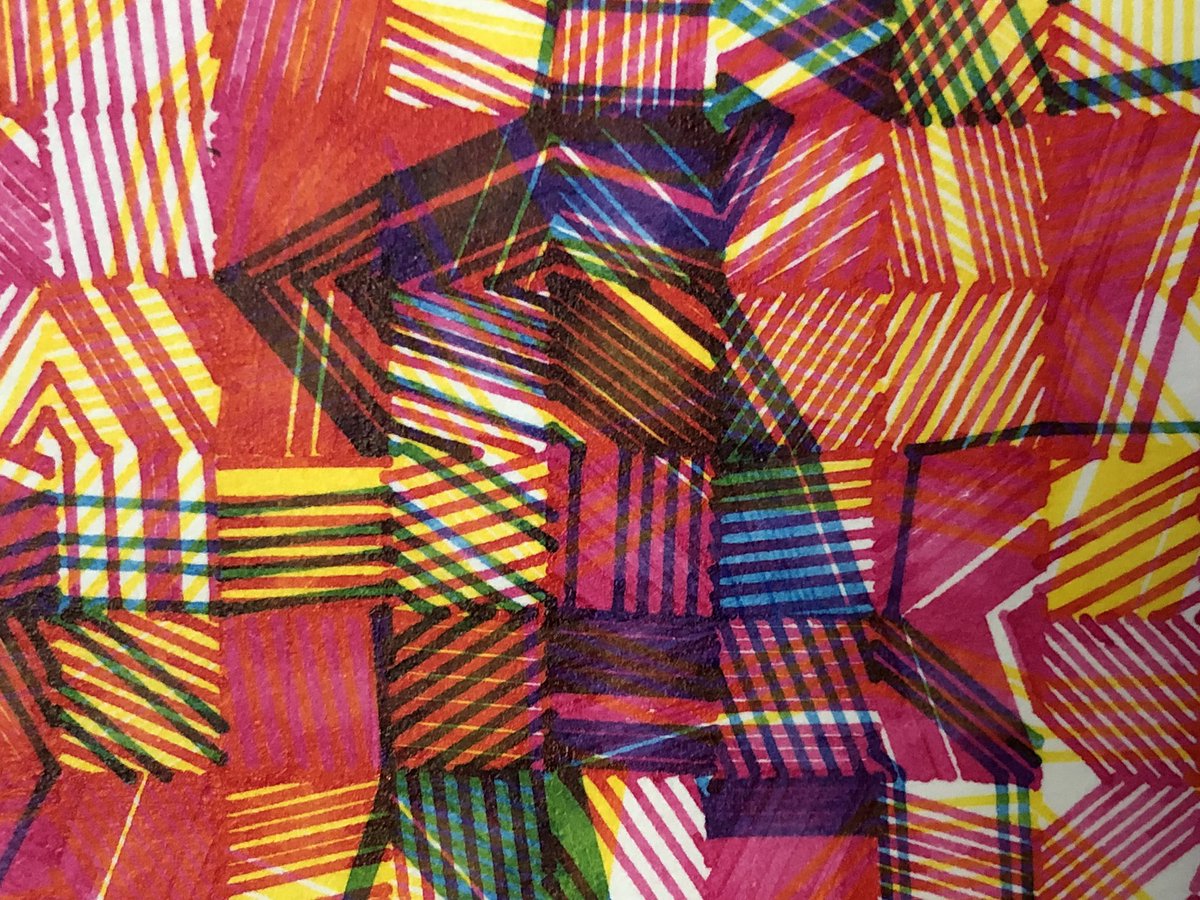 Detail of section showing clipped parallel lines
Breaking it Down
Naturally I sat around noodling away on a Saturday trying to recreate it! If you tried it yourself, you’ll find that there’s some algorithmic sauce involved in achieving this.
In this post, we’ll look at an algorithm that enables us to recreate the style of a single square from the above images.
I should point out that I do not know if this is the exact technique used by Paul in his plots; rather it is simply my interpretation of how I would go about generating something similar. Here are some of the results of my approach.
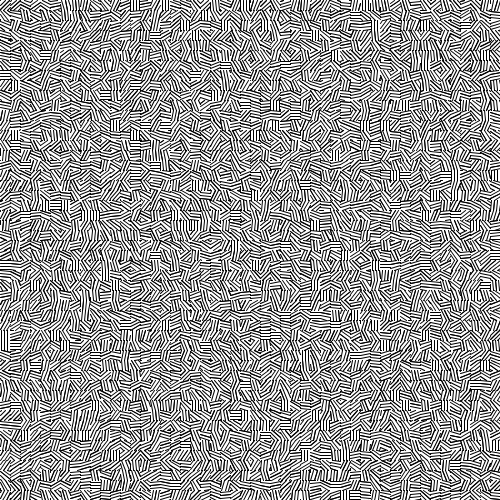 Tiles with random angles and uniform line spacing
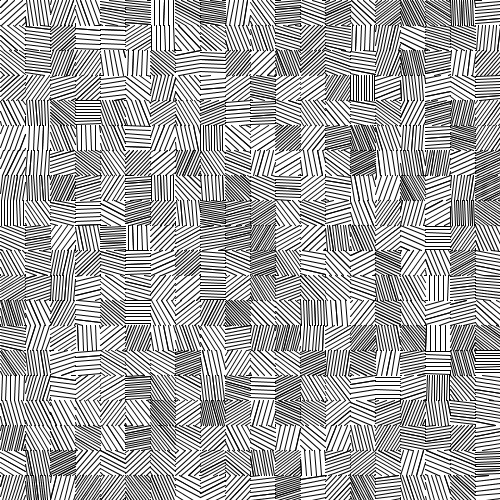 Tiles with random angles and random line spacing
 Tiles with noise-based angles and random line spacing
 Tiles with random angles and Y-axis-based spacing
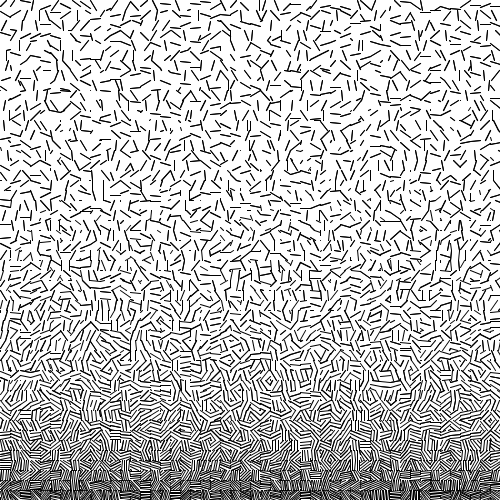
 Tiles with random angles and image-based line spacing
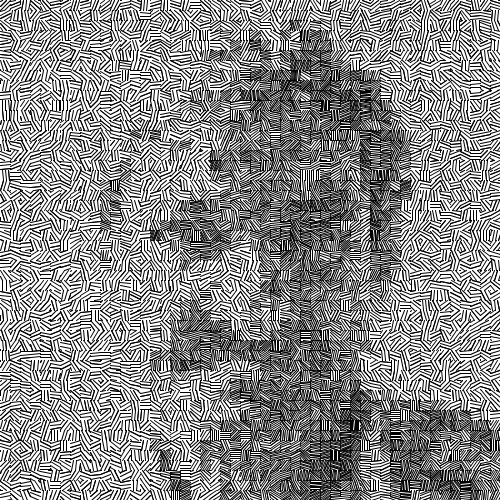
 Detail of image-based portrait
Overview of the Approach
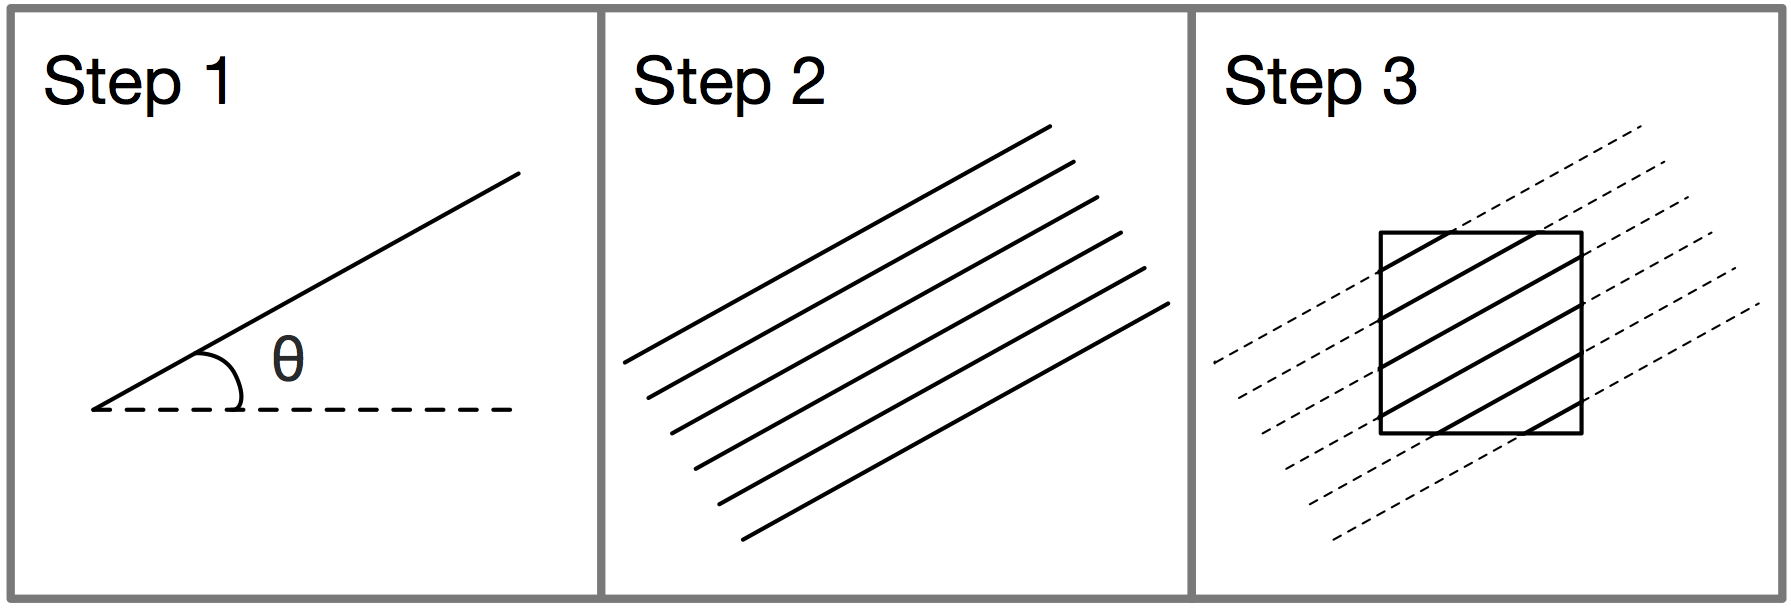
The basic idea is to (i) draw a single line at an arbitrary angle, (ii) create parallel copies of it spaced by some user-specified distance, and finally (ii) clip them off to fall within a specified square.
So how do we actually perform these steps? In particular, how do we manage the third step, where we clip lines to fall within a given square?
The solution is a general class of algorithms designed for computer graphics called clipping algorithms. The idea is to be able to clip a shape to only the parts of it that fall within a window. While there are many clipping algorithms aimed at different shapes (from lines to complex polygons) and varying in complexity, we’re going to look at a simple one for clipping lines within a rectangular window. Enter the Cohen-Sutherland line clipping algorithm!
Cohen-Sutherland Line Clipping
The Cohen-Sutherland algorithm is a fast algorithm for clipping a line to the part of it that lies within a specified rectangular window. We’re going to implement it in Processing using the following function skeleton:
/*
 * Draw a line between (x0, y0) and (x1, y1), but clipped
 * to a rectangular area described by its top-left corner
 * (clipx, clipy) and its width and height (clipw, and
 * cliph, respectively).
 */
boolean line_clipped(
  float x0, float y0, float x1, float y1,
  float clipx, float clipy, float clipw, float cliph) {
  /* Our implementation goes here*/
  /* Return whether a line was drawn or not */
}
The Cohen-Sutherland line clipping algorithm proceeds in three steps:
- If the line being clipped is entirely inside the rectangular window, draw it in its entirety.
- If the line being clipped is entirely outside the rectangular window, skip it altogether.
- Find new coordinates for endpoints of the line that lie within the clipping window (if any), and repeat the procedue above for the new, shortened line.
To perform these steps, we need only consider the endpoints of our line. If both endpoints lie inside the clip window, then the entire line lies inside the window.

Similarly, if both endpoints of a line lie within the same side of the clip window, the line must lie outside it entirely, Below are illustrated the four cases. Also note that you can have an endpoint belonging to multiple regions, such as the top and left region as is the case for the left endpoint of the topmost line in the figure below.

Finally, we get to the case where either both the endpoints lie on different sides of the clip window or one of them does (with the other within the window itself). Illustrated below are the three cases that are possible.

Importantly, note that we can still have the case that the line falls outside the clip window, as illustrated by the leftmost line above.
Encoding Endpoint Regions
The first thing we need to do is to somehow be able to encode the location of an endpoint in terms of the four regions shown above. The Cohen-Sutherland algorithm does this through a simple integer-based bitmap for each endpoint.
The first image below shows how the algorithm uses four bits to represent regions. The image further below shows the resulting encoding for each region.


Let’s quickly write a helper function to do this:
/*
 * Encode a given point (x, y) into the different regions of
 * a clip window as specified by its top-left corner
 * (clipx, clipy) and it's width and height (clipw, cliph).
 */
int encode_endpoint(
  float x, float y,
  float clipx, float clipy, float clipw, float cliph)
{
  int code = 0; /* Initialized to being inside clip window */

  /* Calculate the min and max coordinates of clip window */
  float xmin = clipx;
  float xmax = clipx + clipw;
  float ymin = clipy;
  float ymax = clipy + cliph;

  if (x < xmin)       /* to left of clip window */
    code |= (1 << 0);
  else if (x > xmax)  /* to right of clip window */
    code |= (1 << 1);

  if (y < ymin)       /* below clip window */
    code |= (1 << 2);
  else if (y > ymax)  /* above clip window */
    code |= (1 << 3);

  return code;
}
So far so good! We now have a way to encode the location of an endpoint in terms of the outer regions of the clip window.
The Skeleton
Let’s now write some skeleton code for the Cohen-Sutherland algorithm.
boolean line_clipped(
  float x0, float y0, float x1, float y1,
  float clipx, float clipy, float clipw, float cliph) {

  /* Stores encodings for the two endpoints of our line */
  int e0code, e1code;

  /* Calculate X and Y ranges for our clip window */
  float xmin = clipx;
  float xmax = clipx + clipw;
  float ymin = clipy;
  float ymax = clipy + cliph;

  /* Whether the line should be drawn or not */
  boolean accept = false;

  do {
    /* Get encodings for the two endpoints of our line */
    e0code = encode_endpoint(x0, y0, clipx, clipy, clipw, cliph);
    e1code = encode_endpoint(x1, y1, clipx, clipy, clipw, cliph);

    /* If line inside window, accept and break out of loop */

    /* If line outside window, reject and break out of loop */

    /* Clip one of the endpoints, recalculate codes, and repeat */
  } while (true);

  /* Only draw the line if it was not rejected */
  if (accept)
    line(x0, y0, x1, y1);

  return accept;
}
Since we’re going to be clipping the line one end at a time, we need to repeat the checks after each “clip”. The function above uses a do-while loop to do this, and this is where we’re going to put our clipping logic.
The Trivial Cases
Let’s first deal with the two easy cases of when (i) both endpoints are inside the clip window and (ii) both endpoints share a common region and the line falls outside the window:
boolean line_clipped(
  float x0, float y0, float x1, float y1,
  float clipx, float clipy, float clipw, float cliph) {
  ...
  do {
    e0code = encode_endpoint(x0, y0, clipx, clipy, clipw, cliph);
    e1code = encode_endpoint(x1, y1, clipx, clipy, clipw, cliph);

    if (e0code == 0 && e1code == 0) {
      /* If line inside window, accept and break out of loop */
      accept = true;
      break;
    } else if ((e0code & e1code) != 0) {
      /*
       * If the bitwise AND is not 0, it means both points share
       * an outside zone. Leave accept as 'false' and exit loop.
       */
      break;
    }

    /* If line outside window, reject and break out of loop */

    /* Clip one of the endpoints, recalculate codes, and repeat */
  } while (true);
  ...
}
Inside the loop above, the first if condition checks if both the endpoints
have a zero code (recall that this pertains to the clip window itself). In
this case, we just want to draw the entire line as is; we just set accept to
true and break out of the loop.
The second condition checks if the bitwise AND of the two endcodes is non-zero. If the two endpoints share a region, their corresponding bits would be set to 1, and when we apply the bitwise AND, we would get a 1. If they don’t share a region, one of the endpoints would have to have the corresponding bit set to zero, which upon AND’ing would give a zero (AND returns 1 only when both inputs are 1).
So if the result of AND’ing all four bits is non-zero, this means the two
endpoints share a region, and thus lie outside the clip window. We simply
leave accept as it is (initialized to false) and break out.
The Complex Case
Now we come to the final case, where we know the line has some endpoint outside the clip window and we want to clip its end off.
Let’s first pick one of the endpoints to test. Here we only care about those that are outside the clip window so we pick one that isn’t zero:
/* Pick an endpoint that is outside the clip window */
int code = e0code != 0 ? e0code : e1code;
Now we want to clip off the line from this end up to the window edge. Basically we want to calculate a new X and Y coordinate to replace the endpoint. Since we have four edges, we need to deal with each case separately:
float newx = 0, newy = 0;

/*
 * Now figure out the new endpoint that needs to replace
 * the current one. Each of the four cases are handled
 * separately.
 */
if ((code & (1 << 0)) != 0) {
  /* Endpoint is above the clip window */
  newx = ...
  newy = ...
} else if ((code & (1 << 1)) != 0) {
  /* Endpoint is below the clip window */
  newx = ...
  newy = ...
} else if ((code & (1 << 2)) != 0) {
  /* Endpoint is to the right of clip window */
  newx = ...
  newy = ...
} else if ((code & (1 << 3)) != 0) {
  /* Endpoint is to the left of clip window */
  newx = ...
  newy = ...
}

/* Now we replace the old endpoint depending on which we chose */
if (code == e0code) {
  x0 = newx;
  y0 = newy;
} else {
  x1 = newx;
  y1 = newy;
}
Above, we use bit manipulations in the if statement conditions to determine which side of the clip window the endpoint lies on, and calculate some new coordinates to clip it to. After this, we replace the old coordinates with the new one.
So how do we calculate the new “clipped” points? It takes a little bit of maths to figure it out: we find the equation of the line, and find its intersection at the edge of the window.
The equation of a line is given by \(y - y_1 = m(x - x_1)\), where \((x_1, y_1)\) is one of the endpoints and $m$ is the slope of the line determined using both endpoints:
\[m = \frac{(y_1 - y_0)}{(x_0 - x_1)}\]Programmatically, we get:
y - y1 = ((y1 - y0) / (x1 - x0)) * (x - x1);

/*
 * Given a fixed X coordinate x, we can determine the
 * corresponding Y coordinate using the following
 * simplified equation.
 */
y = ((y1 - y0) / (x1 - x0)) * (x - x1) + y1;

/*
 * Given a fixed Y coordinate y, we can determine the
 * corresponding X coordinate using the following
 * simplified equation.
 */
x = ((x1 - x0) / (y1 - y0)) * (y - y1) + x1;
And we know, depending on the region that we’re clipping from, we want to constrain either the X or Y coordinate to the corresponding minimum or maximum extent of the clip window. So the code we get is the following:
/*
 * Now figure out the new endpoint that needs to replace
 * the current one. Each of the four cases are handled
 * separately.
 */
if ((code & (1 << 0)) != 0) {
  /* Endpoint is above the clip window */
  newy = ymax;
  newx = (x1 - x0) * (ymax - y0) / (y1 - y0) + x0;
} else if ((code & (1 << 1)) != 0) {
  /* Endpoint is below the clip window */
  newy = ymin;
  newx = (x1 - x0) * (ymin - y0) / (y1 - y0) + x0;
} else if ((code & (1 << 2)) != 0) {
  /* Endpoint is to the right of clip window */
  newx = xmax;
  newy = (y1 - y0) * (xmax - x0) / (x1 - x0) + y0;
} else if ((code & (1 << 3)) != 0) {
  /* Endpoint is to the left of clip window */
  newx = xmin;
  newy = (y1 - y0) * (xmin - x0) / (x1 - x0) + y0;
}
Putting it all together, here is our final function for Cohen-Sutherland line clipping in one nice copy-pasteable snippet:
/*
 * Encode a given point (x, y) into the different regions of
 * a clip window as specified by its top-left corner (cx, cy)
 * and it's width and height (cw, ch).
 */
int encode_endpoint(
  float x, float y,
  float clipx, float clipy, float clipw, float cliph)
{
  int code = 0; /* Initialized to being inside clip window */

  /* Calculate the min and max coordinates of clip window */
  float xmin = clipx;
  float xmax = clipx + clipw;
  float ymin = clipy;
  float ymax = clipy + clipw;

  if (x < xmin)       /* to left of clip window */
    code |= (1 << 0);
  else if (x > xmax)  /* to right of clip window */
    code |= (1 << 1);

  if (y < ymin)       /* below clip window */
    code |= (1 << 2);
  else if (y > ymax)  /* above clip window */
    code |= (1 << 3);

  return code;
}

boolean line_clipped(
  float x0, float y0, float x1, float y1,
  float clipx, float clipy, float clipw, float cliph) {

  /* Stores encodings for the two endpoints of our line */
  int e0code, e1code;

  /* Calculate X and Y ranges for our clip window */
  float xmin = clipx;
  float xmax = clipx + clipw;
  float ymin = clipy;
  float ymax = clipy + cliph;

  /* Whether the line should be drawn or not */
  boolean accept = false;

  do {
    /* Get encodings for the two endpoints of our line */
    e0code = encode_endpoint(x0, y0, clipx, clipy, clipw, cliph);
    e1code = encode_endpoint(x1, y1, clipx, clipy, clipw, cliph);

    if (e0code == 0 && e1code == 0) {
      /* If line inside window, accept and break out of loop */
      accept = true;
      break;
    } else if ((e0code & e1code) != 0) {
      /*
       * If the bitwise AND is not 0, it means both points share
       * an outside zone. Leave accept as 'false' and exit loop.
       */
      break;
    } else {
      /* Pick an endpoint that is outside the clip window */
      int code = e0code != 0 ? e0code : e1code;

      float newx = 0, newy = 0;

      /*
       * Now figure out the new endpoint that needs to replace
       * the current one. Each of the four cases are handled
       * separately.
       */
      if ((code & (1 << 0)) != 0) {
        /* Endpoint is to the left of clip window */
        newx = xmin;
        newy = ((y1 - y0) / (x1 - x0)) * (newx - x0) + y0;
      } else if ((code & (1 << 1)) != 0) {
        /* Endpoint is to the right of clip window */
        newx = xmax;
        newy = ((y1 - y0) / (x1 - x0)) * (newx - x0) + y0;
      } else if ((code & (1 << 3)) != 0) {
        /* Endpoint is above the clip window */
        newy = ymax;
        newx = ((x1 - x0) / (y1 - y0)) * (newy - y0) + x0;
      } else if ((code & (1 << 2)) != 0) {
        /* Endpoint is below the clip window */
        newy = ymin;
        newx = ((x1 - x0) / (y1 - y0)) * (newy - y0) + x0;
      }

      /* Now we replace the old endpoint depending on which we chose */
      if (code == e0code) {
        x0 = newx;
        y0 = newy;
      } else {
        x1 = newx;
        y1 = newy;
      }
    }
  } while (true);

  /* Only draw the line if it was not rejected */
  if (accept)
    line(x0, y0, x1, y1);

  return accept;
}
Generating Tiles: The Other Steps
We can now put together a simple procedure for generating tiles like those used in Paul’s plots. I won’t go into details on how the code below works but it follows the three steps shown earlier.
/*
 * Draw a square with top-left corner at (x, y), and side 'w',
 * filled with clipped lines at an angle 'a' and spaced apart
 * a distance 'step'.
 */
void draw_square(float x, float y, float w, float step, float a)
{
  float xstart = x + random(w);
  float ystart = y + random(w);

  float slope = tan(a);
  float c = ystart - slope * xstart;

  boolean downAccept = true;
  boolean upAccept = true;

  int i = 0;

  //for (int i = 0; i < w / step; i++) {
  while (downAccept || upAccept) {
    float x0 = x - w/2;
    float y0 = slope * x0 + c + (float)i * step / cos(a);
    float x1 = x + w + w/2;
    float y1 = slope * x1 + c + (float)i * step / cos(a);;
    upAccept = line_clipped(x0, y0, x1, y1, x, y, w, w);

    x0 = x - w/2;
    y0 = slope * x0 + c - (float)i * step / cos(a);
    x1 = x + w + w/2;
    y1 = slope * x1 + c - (float)i * step / cos(a);
    downAccept = line_clipped(x0, y0, x1, y1, x, y, w, w);

    i++;
  }
}
And that’s it!
Coming back to Paul’s work that inspired this post, you can now really begin to appreciate the work he’s put into giving his plots an organic feel; adding intermittent gaps in the line structure to bring out the color blending, ensuring continuity of lines across tiles, distributing line densities in a pleasing manner across the image and so on. Absolutely beautiful! (For those interested in owning on of Paul’s beauties, and depending on when you read this, I believe some of them may still be up for sale on his website.)